Deployments & rollback
Configure apps, push deployments, manage branches and Git integration, and run workflows for build / update / restart / restore.
App Overview & Actions
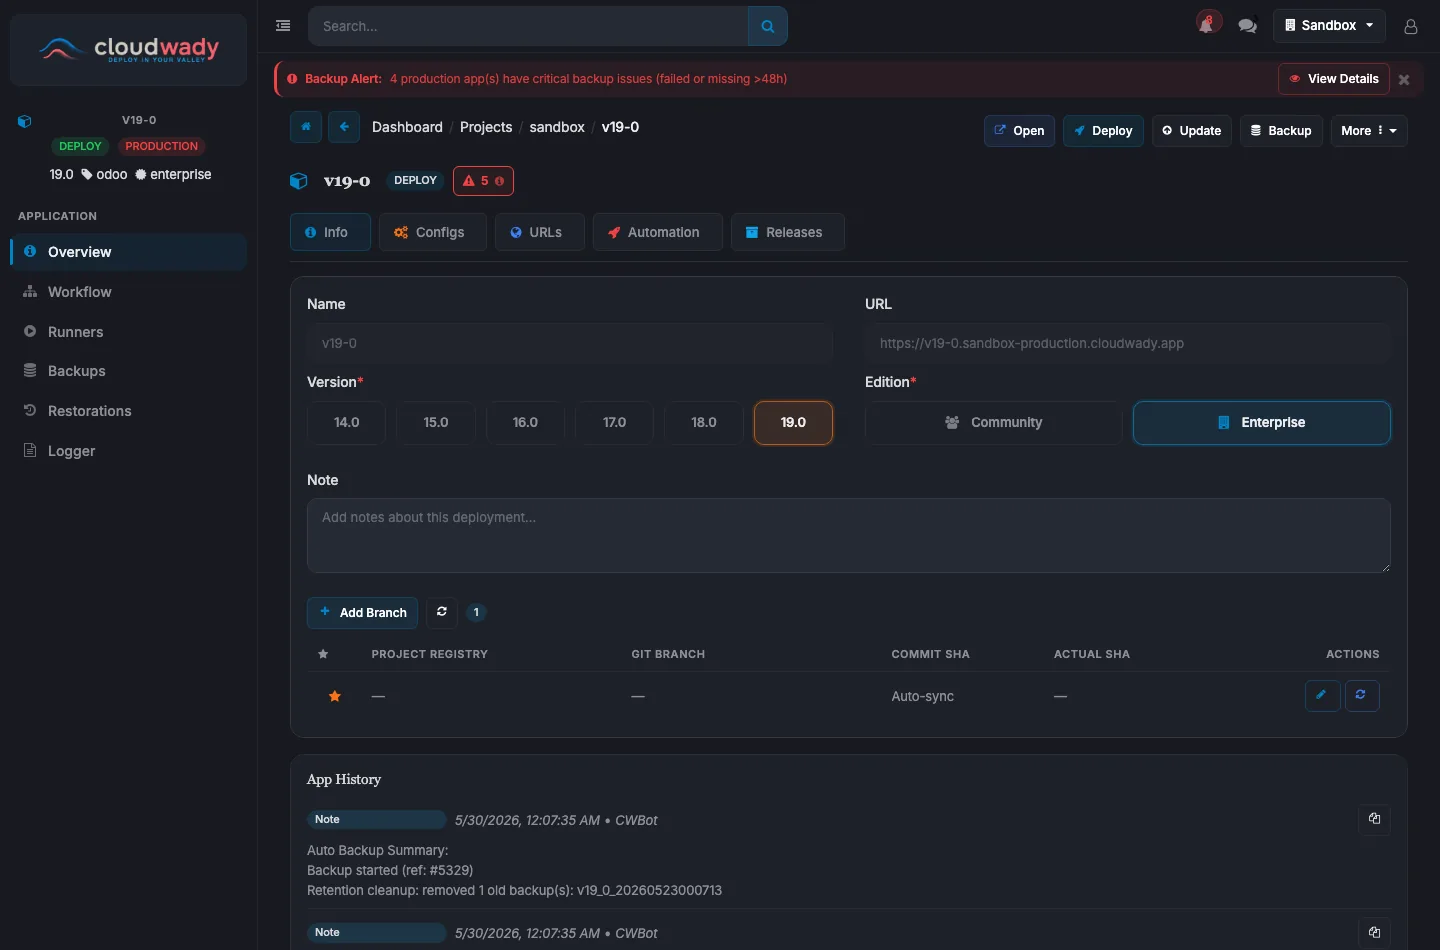
The application screen is where you manage an individual Odoo deployment with detailed configuration, deployment controls, and operational tools.
/deployment/app/{id}?menu=info
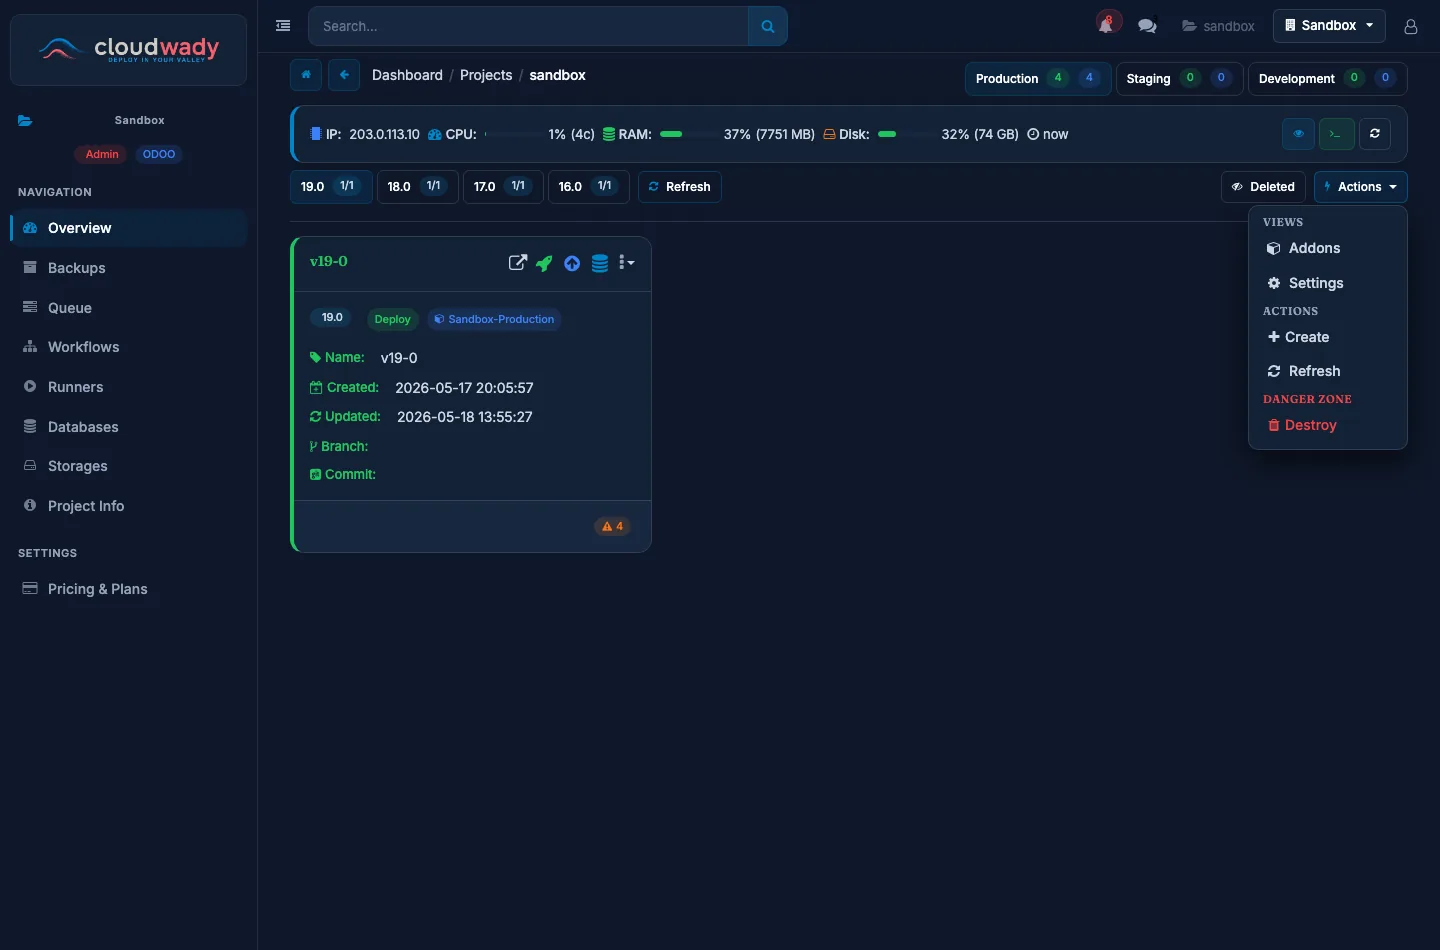
App Header
The header shows the app name, environment badge (PRODUCTION, STAGING, DEVELOPMENT), Odoo version, engine type, edition, and state badge. Quick action buttons are always available at the top.
App Sidebar Navigation
| Menu item | What it does |
|---|---|
| Overview | App details across tabs (Info, Configs, URLs, Automation, Releases) plus the app history. |
| Workflow | Workflow / deployment execution history for this app. |
| Runners | Ansible runner executions for this app. |
| Backups | Backup history and on-demand backups. |
| Restorations | Restoration history and cross-server restores. |
| Logger | Live application log viewer. |
Overview Tabs
| Tab | Badge | Description |
|---|---|---|
| Info | Core | Name, public URL, Odoo version & edition, deployment note, and the Git branch table. |
| Configs | Advanced | Database, workers, OCA queue, config patch, and routing/limits (changes require a redeploy). |
| URLs | Routing | Domain and URL management with SSL provider and certificate controls. |
| Automation | Pipeline | Auto-install, coverage, deadlines, and backup scheduling. |
| Releases | Rollback | Release Manager — browse releases and switch or roll back to a previous one. |
Info tab
The default tab (shown above): app name, public URL, Odoo version and edition, a deployment note, and the branch table — add a Git branch and bind it to a project registry so the app tracks and deploys that branch.
URLs tab

Configs tab

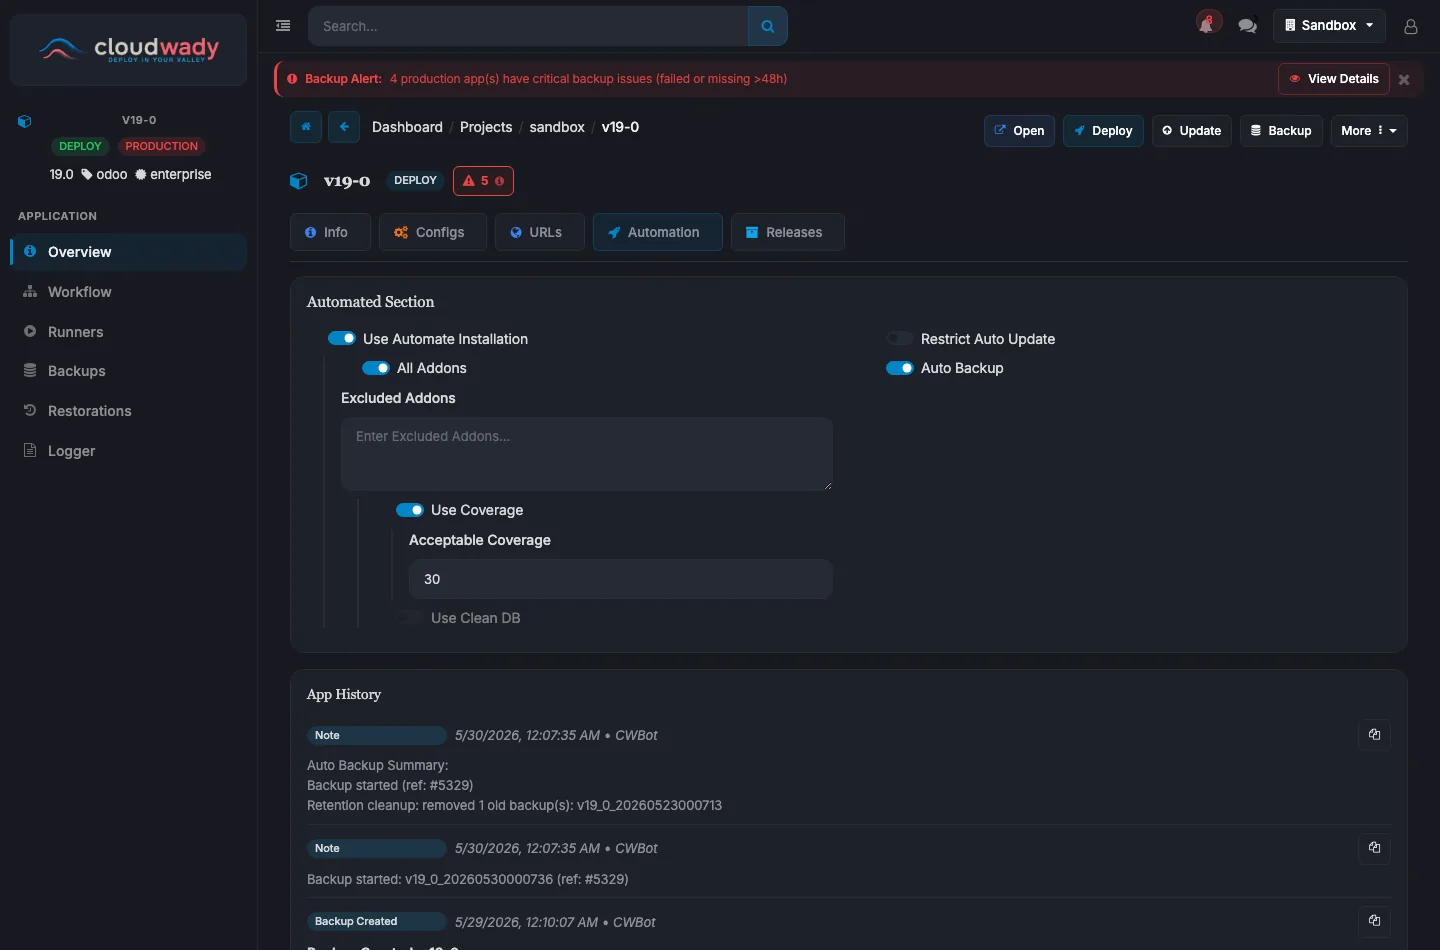
Automation tab
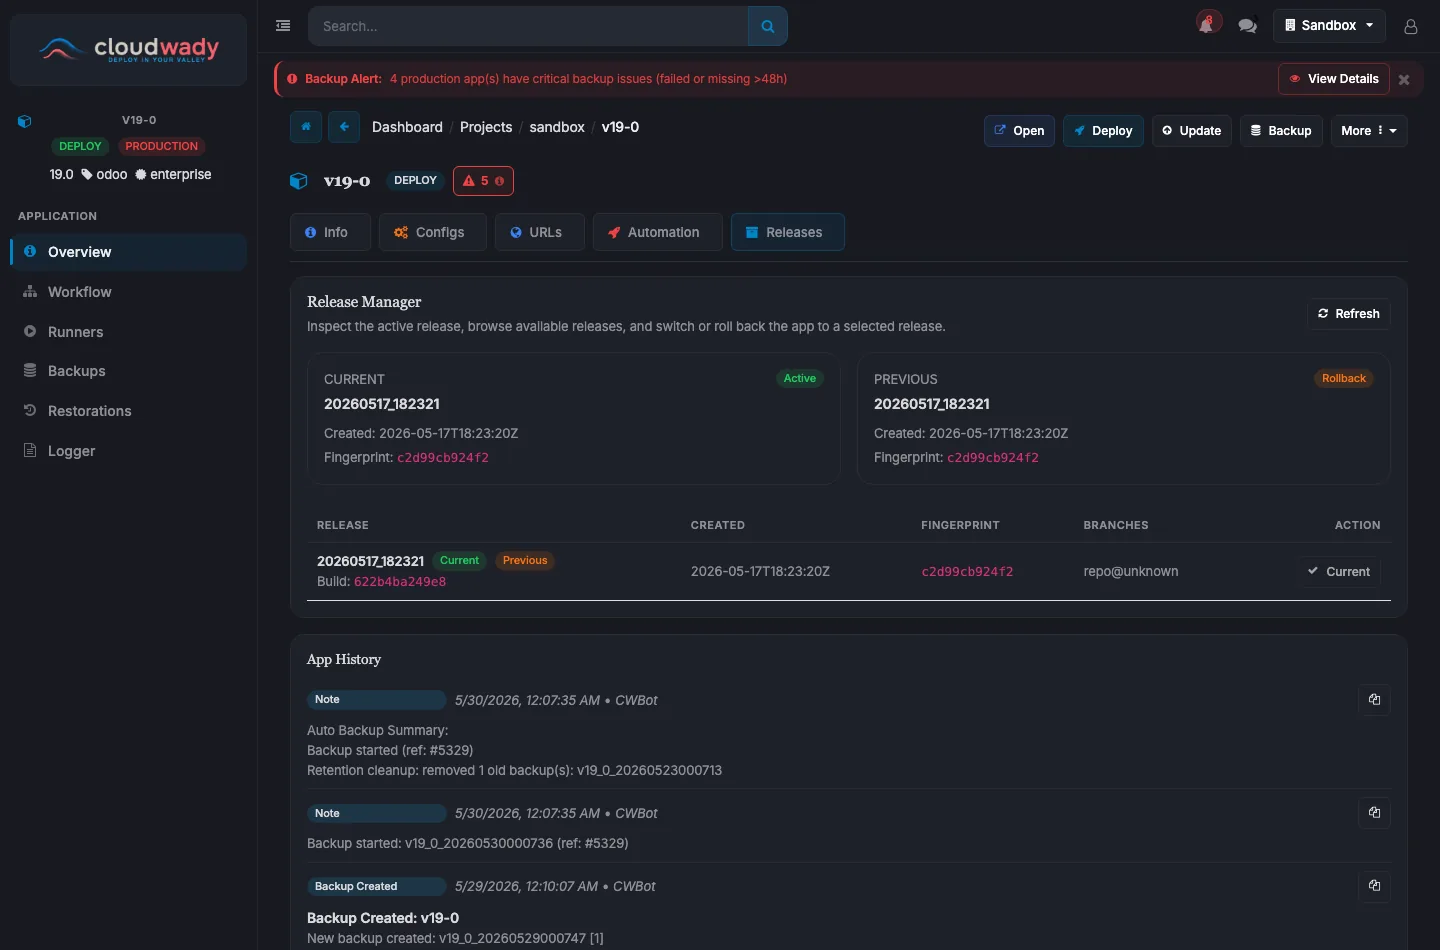
Releases tab
Header Actions
| Action | Description | Access Level |
|---|---|---|
| Open | Launch the running Odoo instance in a new tab | All |
| Deploy | Full deployment: build Docker image, configure, and start | Developer+ (env-type specific) |
| Update | Pull latest code from Git branch and restart | Developer+ (env-type specific) |
| Backup | Create a database and filestore backup on demand | Developer+ (env-type specific) |
| Retry | Retry failed operation (only shown when state is error or canceled) | Developer+ (env-type specific) |
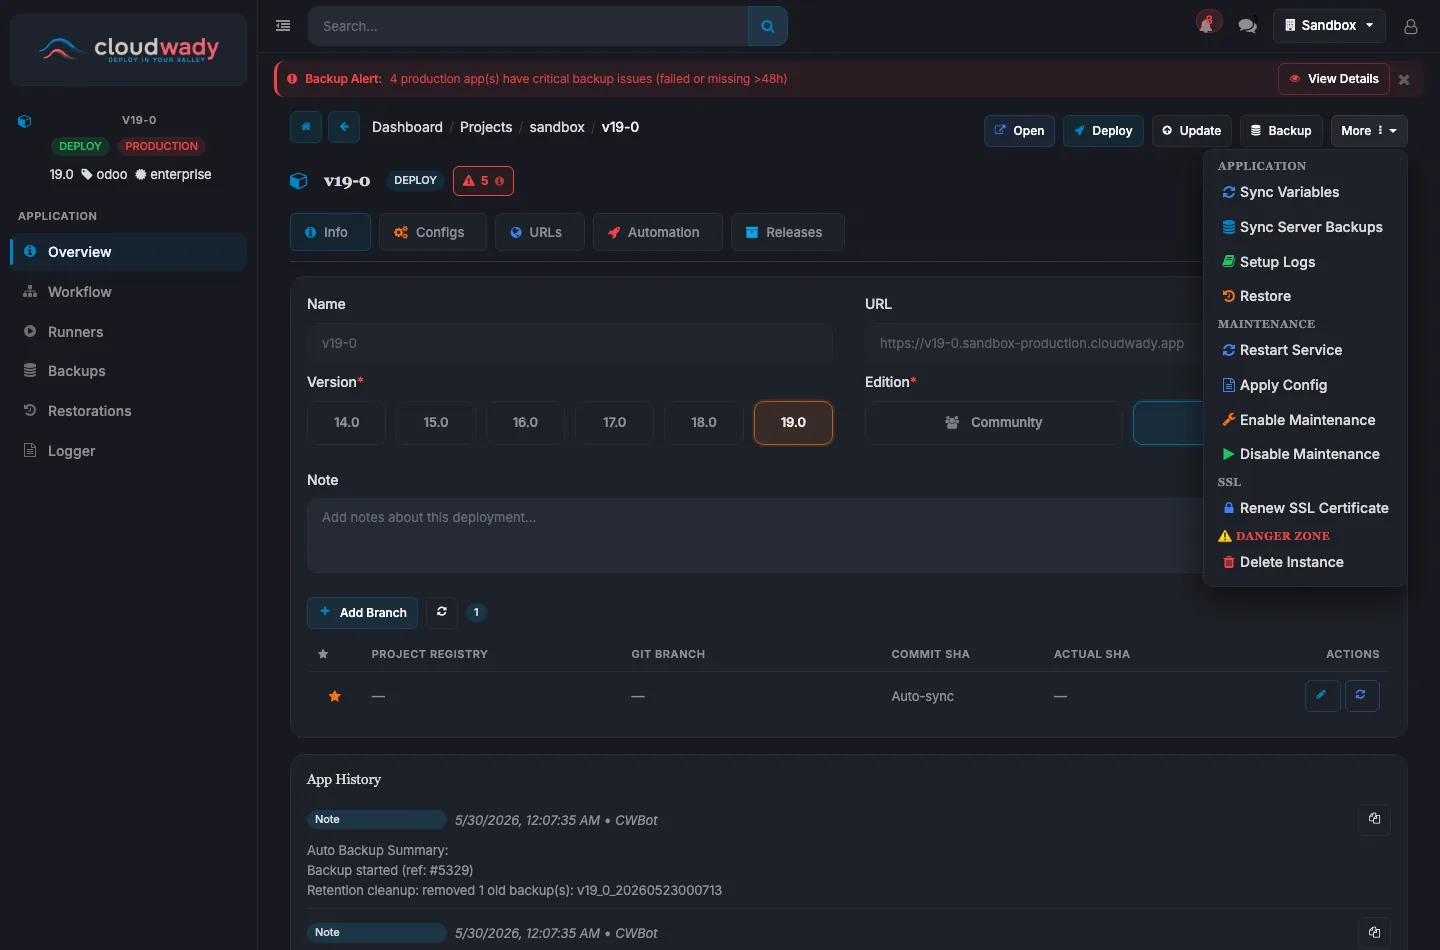
More Dropdown - Application Section
| Action | Description | Access Level |
|---|---|---|
| Sync Variables | Synchronize environment variables with the server | Developer+ |
| Sync Server Backups | Sync backup records with server storage | Developer+ |
| Setup Logs | Configure application logging | Developer+ |
| Restore | Initiate a restoration operation | Developer+ |
More Dropdown - Maintenance Section
| Action | Description | Access Level |
|---|---|---|
| Restart Service | Restart the running service without rebuilding (only when deployed) | Developer+ |
| Update Config | Push config changes without full redeploy (only when deployed, Docker method) | Developer+ |
| Enable Maintenance | Put app into maintenance mode | Developer+ |
| Disable Maintenance | Take app out of maintenance mode | Developer+ |
More Dropdown - SSL Section
| Action | Description | Access Level |
|---|---|---|
| Renew SSL Certificate | Trigger SSL certificate renewal for this app | Developer+ |
More Dropdown - Danger Zone
| Action | Description | Access Level |
|---|---|---|
| Delete Instance | Remove the deployed instance (when state is deploy or error) | Admin |
| Destroy | Destroy the app completely (when state is draft, delete, or disabled) | Admin |
Branch Actions
| Action | Description |
|---|---|
| Refresh SHA | Fetch latest commit SHA from Git |
| Download Addons | Download addon source files from the branch |
| Copy Branch Name | Copy branch name to clipboard |
| Copy SHA | Copy the full commit SHA to clipboard |
| Delete | Remove branch connection (non-main branches only) |
URLs Tab Actions
| Action | Description |
|---|---|
| Add New URL | Add a new URL/domain entry |
| Deploy SSL Certificates | Deploy SSL certs for all URLs (if SSL provider set) |
| Check SSL | Check SSL certificate status per URL |
| Download from Storage | Download SSL cert from storage |
| Upload to Storage | Upload SSL cert to storage |
| Renew SSL | Renew certificate for a specific URL |
| Delete URL | Remove URL entry (disabled for primary URL) |
Configuration Tab Fields
Key configuration fields include: Database selection, Admin password (with Get Password and Regenerate Password actions), Workers count, Max cron threads, Force pull template, OCA Queue toggle with channel config, and Config patch (custom Odoo configuration).
Automation Tab Fields
Automation settings include: Automatic installation toggle, Restrict Auto Update (exclude this app from push-triggered builds — see Controlling Automatic Updates on Push), Auto backup scheduling, Deadline date (non-production), All/select addons, Excluded addons, Coverage analysis, and Clean database option.
Configuration
The Configs tab (shown above) holds the app's runtime configuration: database options (admin password, OCA queue, full-template rebuild), workers and threads, additional system packages, routing & limits, and a free-form config patch appended to odoo.conf.
Available Actions
| Action | Description | Access Level |
|---|---|---|
| Apply Config | Stage configuration changes to be applied on the next deployment | Developer+ |
| View Config | Preview the fully rendered odoo.conf for this app | Developer+ |
Branches & Git Integration
CloudWady integrates with GitHub via the GitHub App for automatic branch tracking and webhook-based deployments. Branches are managed from the branch table on the app's Info tab (shown at the top of this page) — use Add Branch to bind a Git branch to a project registry.
Branch Table
The branch table shows all connected Git branches with columns:
- Main flag: Indicates the primary branch used for deployments.
- Project Registry: The connected Git repository.
- Git Branch: Branch name with the latest commit SHA in parentheses.
- Commit SHA: Full commit hash with copy action.
- Actions: Refresh SHA, Download Addons, Copy, and Delete operations.
GitHub App Connection
- Install the CloudWady GitHub App on your organization.
- Select which repositories to grant access to.
- Branches are automatically discovered and tracked.
- Pushes to your branch can automatically trigger deployments via webhooks.
Controlling Automatic Updates on Push
Whether a push actually triggers a build is controlled at two levels — the environment decides if push automation runs at all, and each app can opt out individually:
| Setting | Where | What it does |
|---|---|---|
| Auto-Update Apps | Environment → Overview → Automation | When a tracked branch receives a push, run Update on its existing apps. |
| Auto-Deploy Apps | Environment → Overview → Automation | When a branch receives a push, run Deploy on its apps — or create a new app for a branch that has none yet. |
| Auto-Delete Apps on Branch Removal | Environment → Overview → Automation | When a branch is deleted upstream, queue deletion of its apps. Always off for production environments. |
| Restrict Auto Update | App → Overview → Automation tab | Per-app opt-out: this app is skipped by all push automation, even when the environment toggles above are enabled. Manual Deploy / Update still work normally. |
Finding the environment settings
- Open your project and pick the environment tab (Production / Staging / Development) at the top right.
- Click the Actions dropdown on the environment toolbar and choose Settings (under Views).
- The toggles are in the Automation card of the settings view.
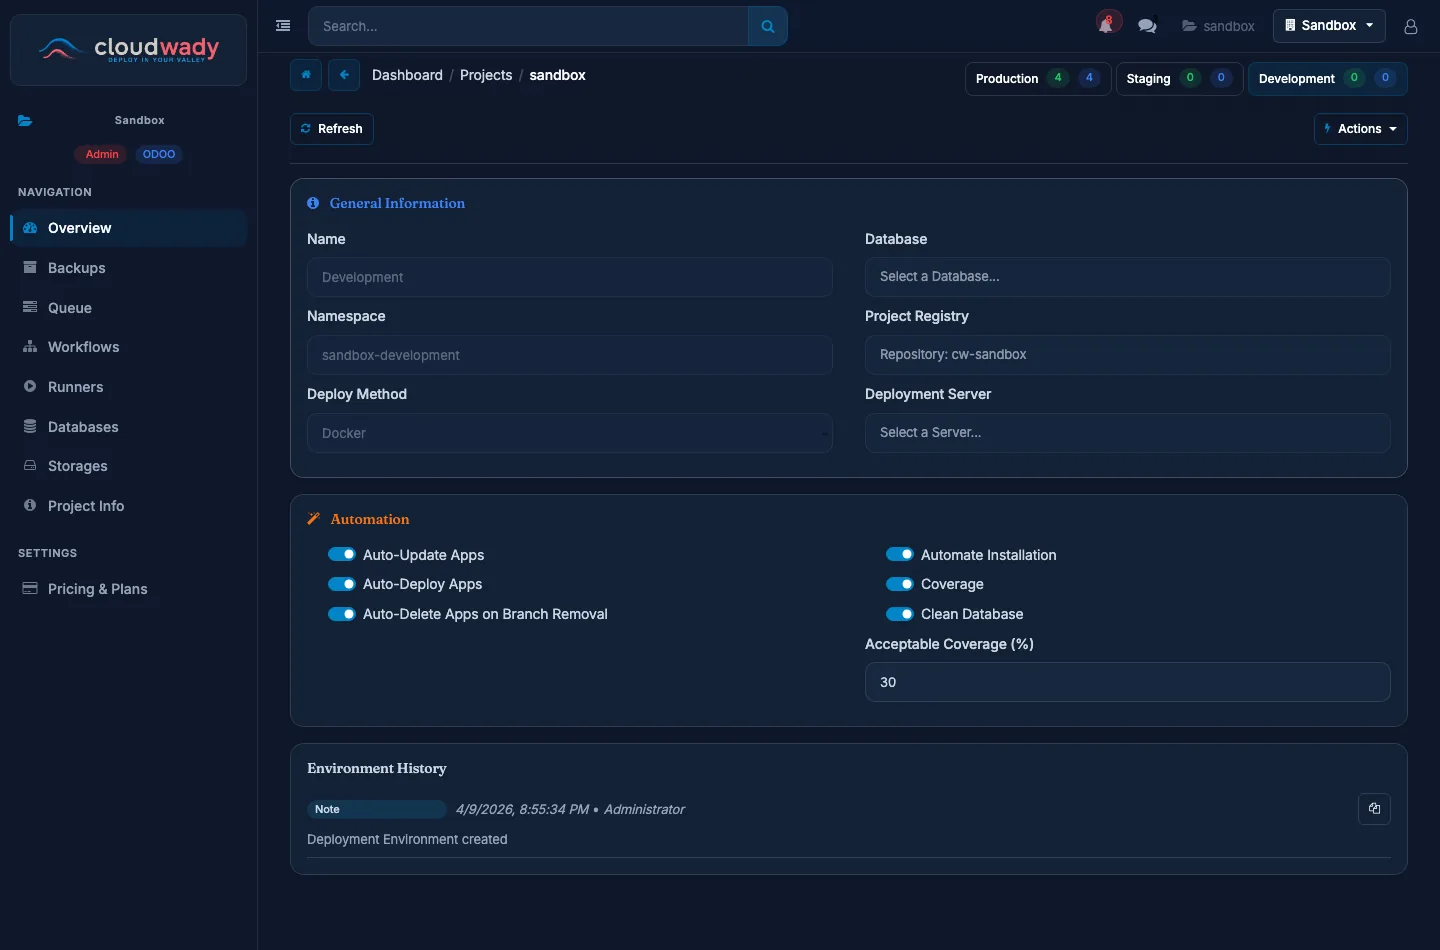
New environments start with type-based defaults:
| Environment type | Auto-Update | Auto-Deploy | Auto-Delete |
|---|---|---|---|
| Development | On | On | On |
| Staging | On | Off | Off |
| Production | Off | Off | Off (locked) |
Workflows & Deployment
The Workflow section shows the execution history of all automation tasks for your application.
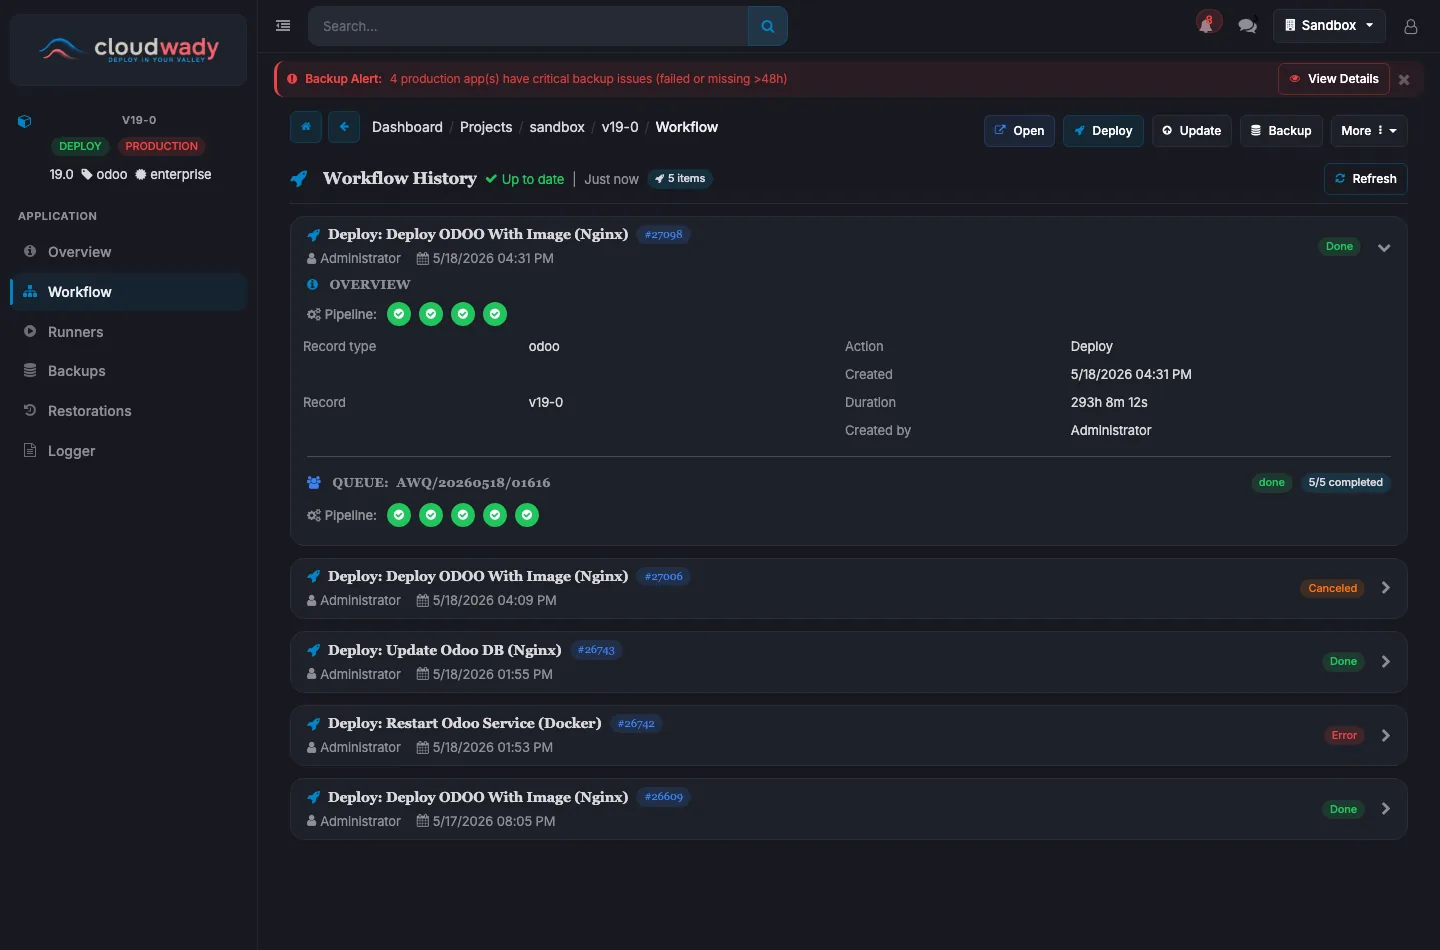
Workflow History
Each workflow entry displays:
- Workflow name: The operation type (Deploy, Update, Backup, etc.).
- Status badge: Color-coded state (Pending, Executing, Completed, Failed).
- Timestamp: When the workflow was triggered and completed.
- User: Who initiated the workflow.
- Expandable details: Click to view the full execution logs.
How Deployments Work
- Trigger: Click Deploy, Update, or another action button.
- Queue: A workflow job is created and queued for processing.
- Execution: The platform picks up the job and runs it on the target server.
- Progress: Real-time output streams to the dashboard via WebSocket.
- Result: Job completes with success or failure status, with full logs stored for review.
Rolling Back a Deployment
Every successful build is recorded as a release. Open the app's Releases tab to see the current and previous releases with their build fingerprints, then switch or roll back to any earlier release — the platform redeploys that exact build without rebuilding from Git, so you can recover quickly from a bad deploy.
Available Actions
| Action | Description | Access Level |
|---|---|---|
| Time filter | Filter workflow history by time range | All |
| Refresh | Reload workflow history | All |
| Status filter | Filter by execution status (Pending, Running, etc.) | All |
| Expand entry | View detailed execution output for a workflow run | All |